To print opaque white on a clear, dark, or metallic label, use a print system that supports a white ink or toner channel and prepare a dedicated white separation in the artwork. Standard CMYK devices generally rely on a white substrate and cannot create opaque white. The exact file naming, layer order, and print sequence depend on the printer and RIP.
Decide what the white layer must do
White can be a visible design color, an underbase beneath CMYK, or a selective mask that blocks a metallic or transparent substrate. Those jobs require different shapes and sometimes different opacity. Mark each intended use in the artwork and proof it against the actual container color.
On a clear label, a white underbase can keep color from disappearing into the product or background. A selective white layer can also create a no-label look while preserving readable text. On metallic stock, it can control where the metallic effect remains visible.
Build the white separation correctly
A common workflow places white elements on a separate layer and assigns a named spot color recognized by the RIP. Some systems require a specific spot-color name, overprint setting, or layer order. Follow the current workflow guide for the printer rather than copying a generic file recipe.
Check for unwanted white halos around CMYK objects. Choke or spread settings may be needed to compensate for registration, but the correct amount depends on the device, material, and artwork. Proof fine reverse text and small objects at production speed.
Choose a white-capable process and test it
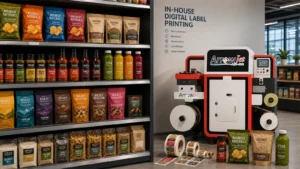
Arrow’s current UV label printer overview includes configurations with white capability. White toner, UV inkjet, and hybrid processes behave differently, so match the technology to substrate, volume, finish, and durability instead of treating ‘white’ as a single specification.
Test opacity, adhesion, flexibility, scuff resistance, registration, color over white, and appearance on the filled package. White pigments can require careful circulation or maintenance in some systems; follow the manufacturer procedure and plan downtime accordingly.
Buyer and operator checklist
| Decision point | What to check | Why it matters |
|---|
| Application | Container, environment, label size, application method | Determines material and handling |
| Job mix | Quantity by SKU, revisions, peak demand | Shapes capacity and economics |
| Media | Face stock, adhesive, liner, roll format | Affects print, dispensing, and use |
| Output | Color, variable data, durability, finish | Defines acceptance testing |
Build a production-ready label specification
Start with the container and use environment, not a printer model. Record the finished label dimensions, roll orientation, core size, maximum roll diameter, unwind direction, and whether labels will be applied by hand or by an applicator. Add the expected quantity by SKU and the peak quantity, not only the monthly average.
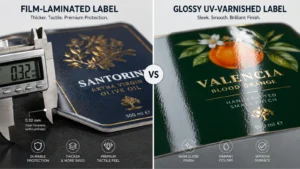
Material selection must reflect real exposure. Paper may be suitable for dry indoor use, while films are often considered for moisture, abrasion, refrigeration, oils, or repeated handling. Adhesive choice depends on the container surface, temperature at application, service temperature, curvature, and whether removal or permanent bonding is required. Test the complete construction on the actual package.
Plan artwork, color, and data handling
Define who owns the approved artwork, how revisions are named, and which elements may change. Keep fonts, linked images, bleeds, cut paths, and spot colors under version control. Variable fields such as lot codes, dates, serial numbers, or regional text need a verified data source and a proofing step before production.
Color expectations should be established with printed samples on the intended stock. A monitor cannot predict how ink, coating, surface color, and finish will interact. Keep an approved physical reference when repeat appearance matters, and recheck output after changes to media, ink, software, or maintenance.
Validate the workflow before scaling
Run a representative pilot that includes the hardest artwork, smallest text, densest barcode if applicable, widest ink coverage, and every important material. Inspect print, drying or curing, cutting, winding, application, and performance after realistic storage and handling. A successful image at the printer is not enough if the roll will not dispense or the label fails in use.
Document settings and acceptance criteria after the test. Train more than one operator, define routine cleaning, and set aside a process for quarantining questionable output. These basic controls make on-demand production repeatable instead of dependent on one person remembering the last successful setup.
Connect printing to finishing and support
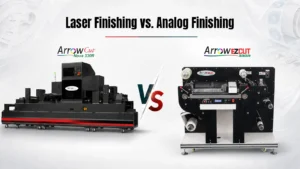
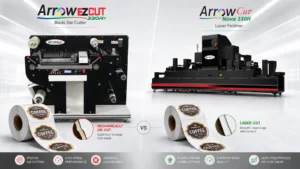
A printed web is not a finished label program. Review label finishing options when cutting, lamination, matrix removal, slitting, or rewinding is required. Confirm service coverage, operator training, spare parts, software, and material sourcing before treating a demonstration as a production plan.
Questions to answer during a supplier demonstration
Bring a written acceptance sheet to the demonstration. Ask the supplier to run your approved artwork on the intended material, at a production-relevant setting, while your team observes setup and changeover. Record usable output, waste, operator actions, cleaning, material handling, and any finishing steps. Confirm which specifications depend on optional modules, software, coatings, or facility conditions.
Before approving equipment or a new outsourced workflow, request the current written quotation, configuration, warranty, training plan, installation responsibilities, service response terms, consumable assumptions, and sample signoff. Identify who will qualify new materials and troubleshoot color, adhesion, transport, or cutting problems. A controlled demonstration answers more than a generic sample or headline specification because it tests the complete path your team expects to operate.